You may be wondering what ever happened to that dress I was working oh, so many moons ago in summer 2015. Well, when my many yards of special-order fabric finally arrived some time in August, I took all of the carefully drafted patterns, the altered mock-up, that lovely white voile, my practice overbodice, and . . . proceeded to do absolutely nothing with any of it ever again. Yup. All that preparation and I never finished it. Good job me.
What I did do was talk with my internship supervisor about what dress I should recreate for the final project, decide on a dress, research the dress and realize I was lacking important visual and contextual information, pick another dress, receive word that the institution currently in possession of that dress was adamantly opposed to the existence of a recreation, and finally settled on an entirely different dress which is distinctly un-famous but photographed in exceptional detail.
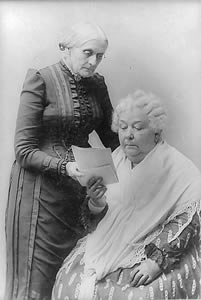
The dress on the left is the one I finally chose to recreate. Decorative details, closure, and silhouette were all easy to see in the various photographs showing Anthony wearing this garment.
With the dress selected, I charged ahead. I drafted a budget, received approval and funding from the museum, drafted my patterns, and made my mock-up. One of the most important aspects of historical clothing is silhouette, which must be built from the inside out. Even though the dress I made is going to be on display rather than worn by an actual person, I needed to emulate the undergarments which would have been worn under this kind of dress. The dress I chose to recreate appears to be from the 1880s. The shape of the skirt would likely have been created with a lobster tail bustle or tornure.
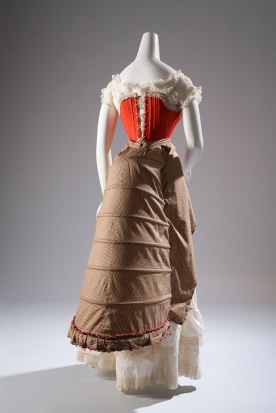
Example of a long lobster tail bustle from the Fashion Institute of Technology Museum collection (http://exhibitions.fitnyc.edu/exposed-lingerie-history-blog/2014/08/07/corset-bustle-circa-1880/)
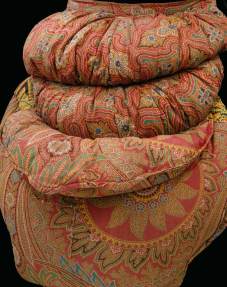
Stuffed fabric bustle from the Victoria and Albert Museum (http://www.vam.ac.uk/content/articles/c/corsets-and-bustles-1880-1890-from-over-structured-opulence-to-the-healthy-corset/)
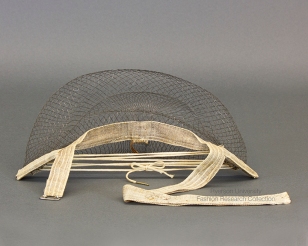
Example of a wire mesh tornure, which would only have extended to the wearer’s thighs. (https://ryersonfashionresearchcollection.files.wordpress.com/2013/10/frc_acc_other_2013-99-001_frt_web.jpg)
For the first support layer I created something like the fabric bustle from the V&A, hoping it would retain the proper shape and serve as a firm foundation for the heavy skirt I was about to construct. Over this I put a second layer made from gathered netting, to add just a little more shape and volume between the primary bustle/tornure and the petticoat. Obviously nylon netting is not historically accurate, however it has a similar texture and stiffness to horsehair, a popular material for tornures in the late 1800s. Next came the petticoat, which serves in part as a buffer between the understructure and the outer skirt, smoothing lines and preventing the bustle frame (or in this case, rough nylon netting) from rubbing and wearing on the principle garment.
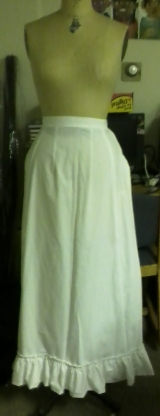
Front view of the petticoat
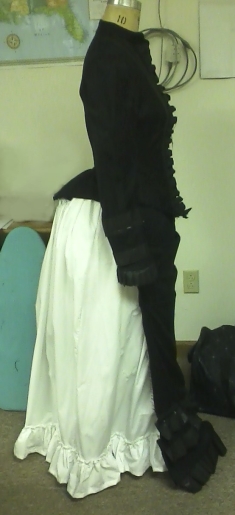
Side view of the petticoat, showing how the bodice drapes over the slight bustle.
The most challenging part of the process was the detailing on the bodice. The front panels consist of alternating strips of moire and the primary fabric (which I was told by a few experienced historical sewers may have been a silk twill) with moire ruffles running lengthwise alongside the center button placket. The sleeves of the bodice are decorated with moire ruffles at the cuff and two bands of moire on each sleeve at the wrist.
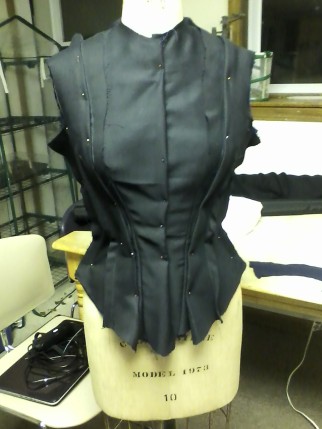
Constructing the bodice involved a lot of trial and error, a great deal of of draping, many hand-basted stitches, and more audible frustration than I care to admit.
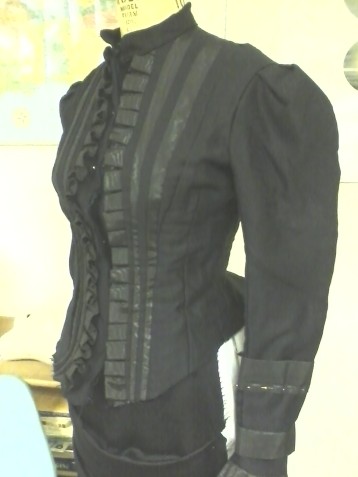
The almost final result
The bottom hem was finished off with some self-bias (making this was an adventure of its own!) and inside the bodice I attached boning (in black twill casing) to all major seams and darts. The photographs of Anthony’s original dress clearly show a button closure at the front of the bodice. While the bodice was in progress, I spoke a bit about the project at a Susan B. Anthony Birthday event held by the Susan B. Anthony Birthplace Museum. Afterwards, an enthusiastic museum supporter offered to write a supplemental check so I could purchase vintage buttons. I did so, but the shanks (the loops on the backs of the buttons where they attach to a garment) were made with fabric which had become too brittle to withstand the tension of holding the bodice closed. I attached the buttons to the front of the bodice but used hooks and eyes as the functional closure.
After all of my work on the bodice, I thought the skirt would be a breeze. I was quite mistaken. The individual components of the skirt were fewer in number and simpler in construction, however I did not anticipate the challenge of working with very large, heavy, and slippery pieces of fabric which needed to be draped, pinned, and sewn without shifting between steps. The pickiest part was the closure, which I did my best to hide between the strips of moire and twill. I used wire hooks and eyes, very common for skirts in the 19th and early 20th century.
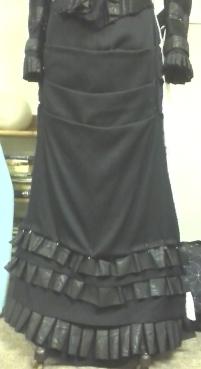
Front panel in process
By the end of this project, I was more than ready to be done. It was months past my original deadline, I had transported the dress form, my sewing machine, and all of the materials between two houses and two dorm rooms over the course of a year, and even brought the partially finished mock-up on a train from Massachusetts to Minnesota and back again over winter break.
My biggest frustrations upon completion are:
- The dress is not made to Susan B. Anthony’s measurements. It is made according to my dress form’s dimensions. I got approval for this ahead of time, but I wish I had tried to find out the correct measurements so I could pad the dress form and make a more accurate representation.
- My dress form is not made to imitate a corseted woman’s figure. The dress form purchased by the museum was made to imitate a corseted woman’s figure. My dress should have been made to fit a corseted woman’s figure.
- The finished bodice did not fit the dress form as well as the mock-up, or as well as the bodice had fit while still in progress. In trying to figure out why, I came across an extremely helpful article on Jennifer Rosbrugh’s website about the need for ease (extra girth added into the pattern) in historical garments. I should have added an extra 5/8 of an inch or so to compensate for the extra layers inside the bodice (i.e. the lining, boning, and boning casing).
Still, overall I am very pleased with how the dress turned out. It’s less than perfect (any experienced seamstress can pick out some of the little flaws here and there) but I do believe I did the best I could. And if nothing else, I learned a lot while making this dress which will help me in future projects.
This whole project was in preparation for the Centennial of Women’s Suffrage. The plan for my dress is to circulate it through the Massachusetts InterLibrary Loan system in the year leading up to the centennial, making stops at selected libraries around the Commonwealth as a temporary display. For an overview of speakers and events planned in Massachusetts, you can visit the Celebrate Suffrage website.


Leave a comment